It couldn’t be easier to transfer your Photo Library from your iPhone to your Windows computer. You don’t need any special software or equipment to do this, no iTunes or iCloud. The only thing you would need is your Lightning-to-USB cable, which you use to charge your iPhone every day. You basically just need to copy pictures from one device to the other.
Use file explorer to copy photos from your iPhone
 First of all, you need to connect your iPhone to your PC, use the charging cable to do this (Lightning-to-USB). Unlock your iPhone. A warning message should appear on your iPhone asking you for permission to access the PC if your don’t have iTunes. It will ask if you trust this computer and if you have iTunes installed. Click on “Trust” or “Allow” to continue. If you are having problems and the message isn’t popping up, try to reconnect your iPhone to PC once again and unlock the iPhone.
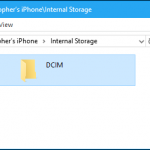
Your iPhone icon will appear on your PC, so just click on it. Open the “DCIM” folder inside your iPhone and continue to folders named 100APPLE or 101APPLE, etc., if you have tons of pics there will be lots of folders. You can only access the DCIM folder from the PC, not any other iPhone files. Pictures are saved as .JPG files, videos as .MOV files, and screenshots as .PNG files. You can double-click them and view from your iPhone or you can select and drag them to your computer. There might be files with .HIEC file extension, which is the extra new format IOS 11 is using by default to take pictures. Unfortunately, you will not be able to view this files on Windows without special software. Luckily, you don’t need to disable the HIEC function on your iPhone to be able to view them from the Windows PC. Go to Settings on your iPhone, scroll to Photos and then tap “Automatic” under Transfer to Mac or PC. It will convert all your pictures to .JPEG when transferring them from iPhone to PC. Now you should be able to see all files.
Import pictures with Windows Photo
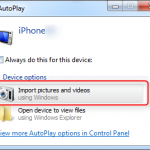
 Any application that can import pictures from any digital device to your PC can also import them from your Apple device. IOS converts the file in special way that only DCIM folder is visible but it is also fully functional for exchanging pictures. You only need to use your special Lightning-to-USB charging cable and choose “Trust” on your iPhone when asked. There are also more ways to transfer pictures. You can, for instance, go to a special Photo application on Windows 10 and click on “Import”. Pictures that were imported this way will be saved in your Pictures folder. Any application (apart from Windows Photo) that has “Import From Camera” or “Import From USB” options will be completely capable of performing the needed functions.
Sync your Photos with iCloud
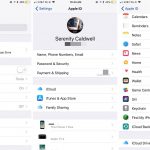
 This option will create a copy of your Photo Library in the cloud and on your computer without even physically connecting your phone to PC. Enable iCloud Photo Library in Settings > Photos and activating “iCloud Photo Library so that your iPhone automatically downloads pics to the cloud. Install iCloud for Windows and set the right folders. Your pictures now will be automatically downloaded to your PC.
Keep in mind that you can also use DropBox, Google Photos etc.


